Zones: Difference between revisions
Jump to navigation
Jump to search
added rect |
|||
| Line 17: | Line 17: | ||
*On foot, you can only reach one place: | *On foot, you can only reach one place: | ||
**[[Somerset Square]] | **[[Somerset Square]] | ||
*With | *With transportation of range 1 you can reach: | ||
**[[University Heights]] | **[[University Heights]] | ||
*With transportation of range 2 you can reach: | |||
**[[Seedy Casinos]] | |||
**[[Bayside]] (and [[Porcelain Bay]]) | |||
*With transportation of range 3 you can reach: | |||
**[[Downtown Twilight]] | **[[Downtown Twilight]] | ||
* | *With transportation of range 4 you can reach: | ||
**[[Heavy Industry District]] | **[[Heavy Industry District]] | ||
**[[Out in the Desert]] | **[[Out in the Desert]] | ||
*With transportation of range 5 you can reach: | |||
**[[Up in the Mountains]] | **[[Up in the Mountains]] | ||
Revision as of 22:28, 19 January 2009
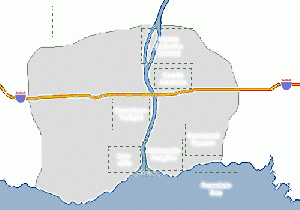
The City of Twilight

To get around scenic Twilight City, you'll need some means of transportation.
- On foot, you can only reach one place:
- With transportation of range 1 you can reach:
- With transportation of range 2 you can reach:
- With transportation of range 3 you can reach:
- With transportation of range 4 you can reach:
- With transportation of range 5 you can reach:
